Markdown is a skeleton to technical articles just as HTML is the foundation of websites. It gives unique styling to the article content, making it easy for readers to digest it.
This guide will uncover the use of markdown and how to write quality articles.
Also Read: How to Write an Engaging Technical Content
Getting Started with Mastering Markdown

Markdown is a markup language — i.e., a computer language used for formatting and structuring text or data — used for formatting article content. It was created by John Gruber in the year, 2004 and has been in use to date. It has made writing and editing content very easy.
Markdowns are not only used for formatting articles, but it’s also used for formatting text messages, readme files, and lots more.
John created Markdown with the key goal to ensure that content readability increases without having heavy markup tags or Rich Text Format (RTF).
Markdown is built to be easy to use, readable and easy to maintain.
Setting up A Markdown File
To set a markdown file, you need to define the file extension, .md. Any file with this extension is recognized as a markdown file.
You can create a markdown file locally (on your PC or mobile device) or do it online (on a web platform).
Here are some notable markdown platforms:
- StackEdit (Web software),
- Ghostwriter (Windows, Linux software),
- MacDown (Mac software),
- iA Writer (Mobile software), and lots more.
With the mentioned software, you can create markdown files and format your content.
Basic Markdown Syntax
Markdown is a language, and every language has a syntax like significant tags needed to utilize the language, similar to HTML tags such as br, p, article, etc. These are the syntax used to format HTML documents or files.
Some Markdown Syntax to note:
- Headers and Subheadings:
Headers are used to define the header text of the content. The header tag has different levels (1–5). The header 1, similar to h1 in HTML, is the highest level. The next level of header is known as the Subheading. The more the #, the lower the subheading.
There is only one Main heading tag in Markdown, which is Header 1. A main header can have more than one subheading.
To define a header tag, you need the #.
Here’s an example and its result:
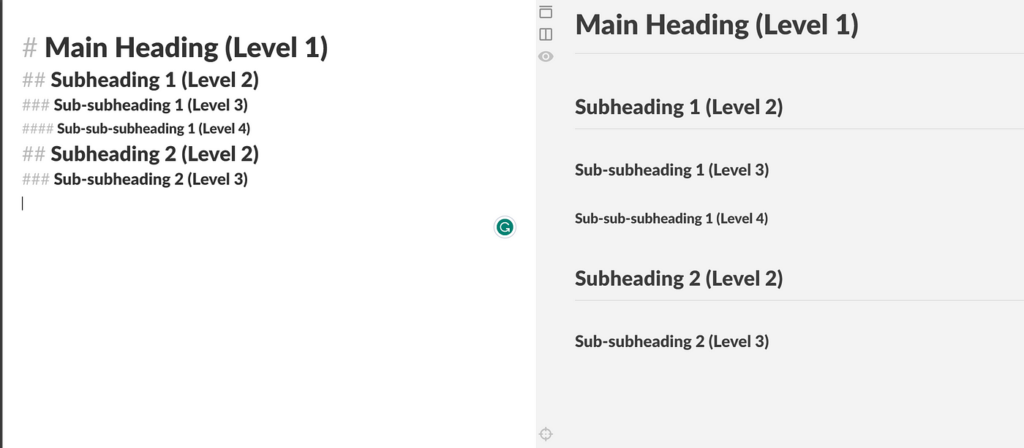
The text on the left side has the # tag to define the header level, and the text on the right side has the result of each level.
The image shows how to define a subheading level under a main heading. It also shows how to use each level of the subheading appropriately.
- Lists:
The list tag is used to list items, text, or data in an article. There are two types of lists: unordered lists and ordered lists.
The unordered lists are used when the text you are mentioning has no order of value, i.e., there is no text that comes after the other or the text that comes first. For example, when you are listing features of software in an article. It doesn’t matter what feature comes first since it’s a random list of features. To create an unordered list, use an asterisk (*), hyphen (-), or plus sign (+) followed by a space.
The ordered lists are used when the text you are mentioning has a specific order of value, i.e., the text comes before another, and it is needed to put it that way. For example, when you are writing a step-by-step guide. You would need to use the ordered list to let the reader know what step comes before the other. To create an ordered list, use numbers and period (.) followed by space.
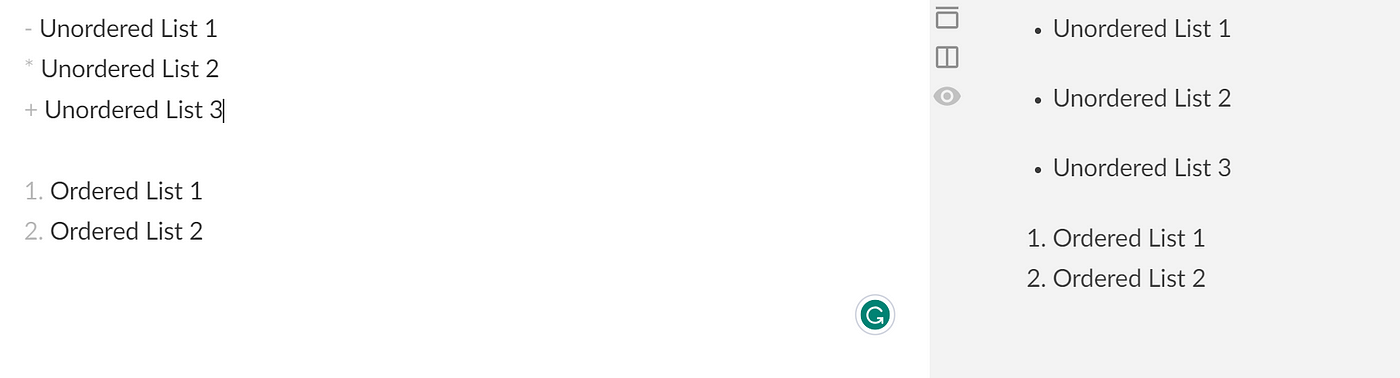
The image shows a visual demonstration of how to create an unordered and ordered list using the syntax mentioned above. The result is seen on the right side of the image.
- Emphasis:
The emphasis tag is used to emphasize a text in an article. This could be done when you make a text or a sentence bolder or italicized than other text. It draws attention to that text or sentence.
To make a bold text or sentence, use the asterisk twice (**) followed by your text and the asterisk again.
To make an italicized text or sentence, use the asterisk once (*) followed by your text and the asterisk again.
You can merge the syntaxes to create bold, italicized text. Use the asterisk thrice (***) followed by your text and the asterisk again.

The image shows a visual demonstration of how to create bold and italicized text using the syntax mentioned above. The result is seen on the right side of the image.
- Links and URLs:
In an article, hyperlinking is very important. Hyperlinking is where you add a link to reference a concept, topic, or text mentioned in an article. It gives your readers a chance to learn more about the text.
The syntax of hyperlinking is [Hyperlink Text](URL). You can also just define your URL if you don’t want to hyperlink.

The image shows a visual demonstration of how to hyperlink a text using the syntax mentioned above. The result is seen on the right side of the image.
- Images and ALT text:
In an article, it is good practice to include images to either aid in visual explanation or to crack a funny joke to break out the nerdy article. It is also good to include cover images to explain what your article is about.
When you are giving a presentation, you use slides to back up your words, right? That’s what an alternative text (alt text) does. In this context, the alt text is your words, and the images are the visual aid. If you face any hiccups during your presentation, you can just keep talking while the projector is fixed. This doesn’t divert your audience’s attention.
The alt text is used to explain what the image is about to improve readability.
To add an image and an alt text alongside, use the exclamation mark (!), [Alt Text](Image URL).

The image shows a visual demonstration of how to add an image and an alt text to the images using the syntax mentioned above. The result is seen on the right-side of the image.
- Line breaks and Paragraphs:
Line breaks are similar to <br> in HTML. It lets you start a new sentence in another line.
To insert a line break without starting a new paragraph, end your sentence with two spaces, followed by the Enter key.
Meanwhile, paragraphs are separated by an empty line. To create a new paragraph, just leave an empty or a blank line in between the sentences.

The image shows a visual demonstration of how to add a line break and start a new paragraph using the syntax mentioned above. The result is seen on the right side of the image.
- Code Blocks
As a technical writer, your main goal is to pass clear information to your readers. This includes ensuring your technical articles are accessible.
When dealing with code snippets, it is best to use code blocks to define your codes. Code block lets you define codes in an article, and it can be copied by your reader (making it accessible) instead of your reader having to deal with writing a long, stressful codebase.
Code block syntax is defined with backticks (`), and you would need to enclose the code snippets with backticks as well. The backticks could either be single (`) or triple (“`) backticks.
The single backtick is used for inline code snippets, while the triple backtick is used for code blocks.

Structuring an Article
As a technical writer, you need to have a structure in mind. This structure includes sections, subsections, headings, tables, etc.
Structuring is an essential part of any article, technical or not. If your structure is poor, you may lose readers. Your article will be messy and inconsistent.
Creating Sections and subsections
Sections and subsections are crucial parts of producing quality technical articles. Breaking down your content into small, manageable sections and subsections makes it easy for you to write and your reader to navigate and understand your article.
Having sections in your articles gives your readers the privilege to skim through your content before deciding to read the full content.
Here are some key pointers to note when creating a section or subsection:
- Ensure each section has a clear and descriptive heading.
- Begin each section with a short introduction that outlines what the section will talk about.
- Use subsection ONLY when writing on complex topics; don’t overuse it.
- Consider adding images or any form of visual aid to a section to improve readability. Note: Not all sections need a visual aid.
- Ensure each section is not lengthy so it does not wear the reader out. Aim for short, concise content per section.
- When needed, cross-reference sections when the sections are related. For example, you can do this: “Use the API key generated from the previous section (hyperlinked to the section) to do X.” This tells your reader the previous section is related to the current section, and it improves reader experience and accessibility.
There are so many tips, but these tips are the key basic ones you need to learn as a beginner.
Organizing content with headings
A well-structured heading engages readers by providing context and setting expectations, which improves accessibility. It gives clarity to both the reader and the writer.
Organizing your content with clearly defined headings makes it easier for you and your readers to navigate, quickly find, and understand the content. Headings also give a hierarchy of sections, which could be used to create a table of contents.
Here are some key pointers to note when using a heading:
- Ensure the heading is crystal clear to you and your audience.
- Avoid overexplaining in a heading.
- Use the right hierarchy of headings and the levels discussed in the previous section.
- Avoid all caps; it may distract the readers. Instead, the first letter should be in capital letters.
Using Horizontal Lines and Blockquotes
Horizontal lines are dividers that are used to separate sections in an article. It is used to introduce or summarize a topic within the article to the reader.
Horizontal lines should be used sparingly and only when necessary. As a newbie in technical writing, you should avoid this till you understand when it is appropriate.
If you must use horizontal lines, use subtle, thin lines so you don’t distract readers.
Blockquotes are used to get the reader’s attention to a text or idea in an article. It could be used to highlight quotes from an external source (could be a quote from Wiki), provide more context, or emphasize key points in the article.
Don’t overuse blockquotes. Use it for only noteworthy or captivating key points or quotes. Also, use the right styling and indentation to note it’s a blockquote.
Adding Tables
Tables are used to display data in a tabular format. You can use tables when writing comparisons or technical articles involving tabular visualization.
When using tables, ensure the heading is clear and descriptive. The rows and columns should not be cluttered and should be neatly formatted. Remember, tables display important data in a tabular format; avoid using them to list ideas; use lists instead.
How to Add Table
In technical writing, tables have a markdown syntax just like other formatting has. To add a table, use pipes (|) and hyphen (-) to structure the table. The columns are separated by pipes, and the header is separated with a hyphen.
A basic table with 2 columns and 3 rows would be defined like this (left side):
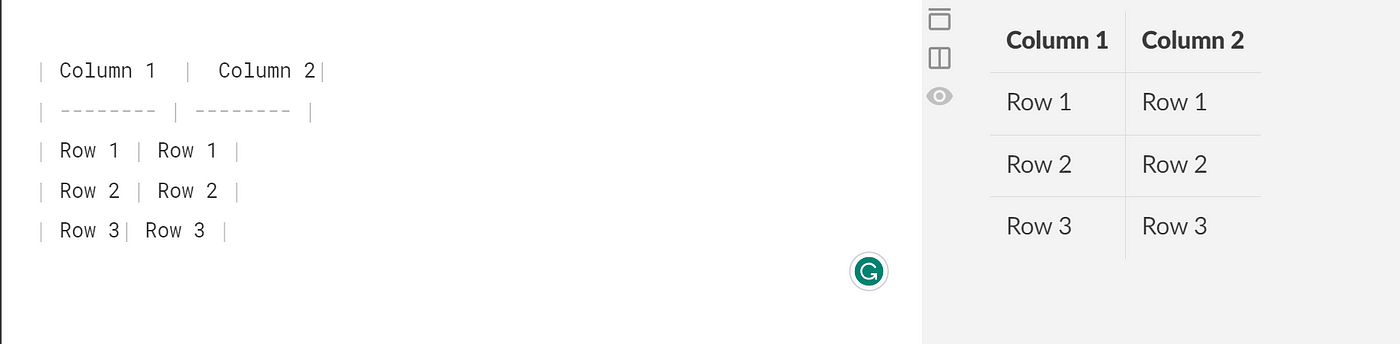
The hyphens separate the header from the other text, and each column is separated by a pipe.
In tables, you can align your header text to be right, left, or center-sided. You need to include an additional syntax. By default, the text in the table is left aligned.
Here is the syntax for specifying the alignment:
- Left-align:
:--- - Center-align:
:---: - Right-align:
---:
The syntax MUST be defined in the header row.
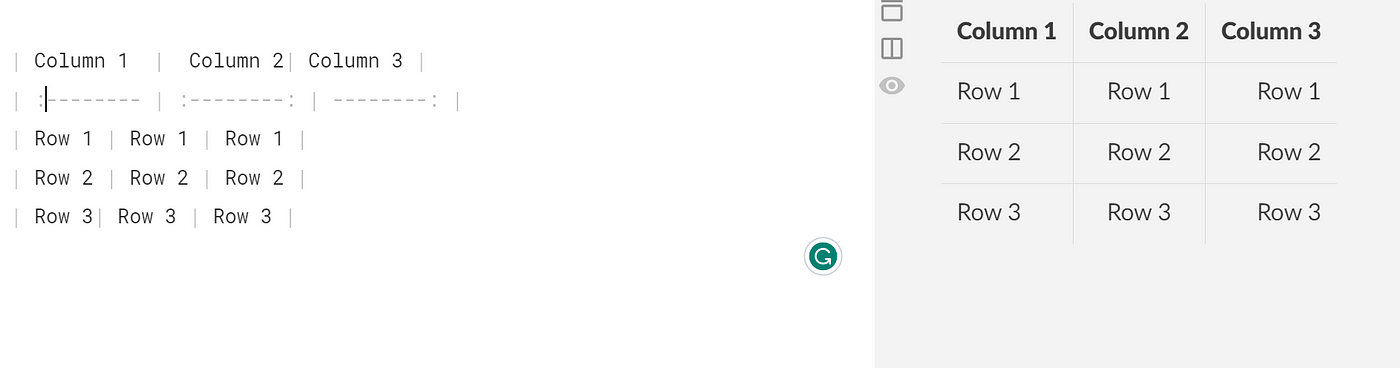
The syntax just needs to be defined in the column header, and it would take effect in that row related to the column.
Conclusion
A markdown is an amazing tool that offers benefits to technical writers. Throughout this article, you learned how to use syntax, how to improve accessibility, and the best practices for structuring documents.
Understanding the basic syntax of markdown and how best to structure documents using hierarchies makes your article 10x times more accessible to readers.
Markdown is a great addition to any writer’s toolkit; giving it a try would make you a better technical writer.